TL;DR: despite the fact that i almost have to re-learn typing, this thing is awesome and i think everyone typing a decent amount of letters a day should get a split, or even a split+vertical keyboard.
I’m not a keyboard enthusiast, but i heard so much about split keyboards and Keyboardio’s Model 01 before that i decided to back their Model 100 on Kickstarter about a year ago. It’s super expensive in my book (about 20% of my monthly salary when i ordered it) but since they announced the project way before the KS campaign i had time to slowly put aside some money every month. This makes it the first electronic device that i actually wanted so much (and probably needed; ergonomics is important, as i learned the hard way coming closer to 40) that i put aside money for it. Their hunt-and-pecking chicken in the promotion video was also pretty convincing.
We got a lot of info on what is happening during the time between backing and delivery. Some video footage of how the keyboards are made, from production to QA, was one of them, and it looked really awesome. Even though i only gave my money, the whole project felt more personal this way.
They had a lot of delay in production due to various reasons (COVID and Chinese new year being the biggest among them) but when i finally got a mail that said
your early-delivery Model 100 is due to be ready to ship out this week. I’m writing today to confirm your shipping address. We’ll send you another email with tracking information as soon as your keyboard ships out.
i was super excited about it and couldn’t wait for it to arrive.
Shipping was handled by FedEx; they did duty handling and delivery quick and with great care. This post is not their review, but they surely deserve a shout-out. My package even arrived one day before they originally promised.
And now, finally onto the review itself! Keep in mind that things below are not in order of importance but more like in the order of how i discovered them.
The package
I really don’t like unboxing videos; i just find them boring. For this keyboard i tried to make one, but quickly dumped the idea. Then i tried to make pictures of the steps, but still no luck: i got two photos of the early steps (opening the first box) than i gave up. So if you are here for unboxing material, you should close the page now.
The package contained two black boxes. They look really cool, with the Keyboardio logo on them. The smaller box contains the stands (which have a standard tripod screw, so you can technically put your keyboard halves on camera tripods next to your desk, if that’s your game). The bigger box contained nothing but a travelling case. It’s pretty sturdy, covered with black textile, and with a bumpy logo. The keyboard has travelled all the way from China in that case; travelling case redefined.
Inside the case were the two keyboard halves, a USB-C to USB-A cable, two RJ45 cables (a short one when you use the keyboard as one piece, and a long one if you want to use it split), a key switch puller (because if you don’t like your switches, you can switch to different switches; i’ll show myself out), two pieces of plastic to hold the two halves together in a linear or a rooftop shape, and a screwdriver. Because your warranty is not void if you take the keyboard apart. Because why should it be?
Assembling the keyboard, especially in a split fashion, is not a big deal, just connect one of the RJ45 cables to both halves, then use the USB-C cable to connect the left half to your computer, and you are good to go.
The Look
This thing has got the look; it is beautiful! The folks at Keyboardio didn’t name it “heirloom keyboard” for nothing. When i ordered it i had a green desk so i chose the walnut case, which is a darker shade of brown. Since then i switched to a new desk i got from my brother-in-law, which is also dark brown (although slightly darker then the keyboard’s enclosure), so i’m probably up to painting or re-foiling my desk soon. Still, it looks good on my desk, even if it doesn’t stand out.
My new(ish) desk has a drawer-like thingy for the keyboard, but its height is designed to hold a traditional keyboard; for the Model 100 on its stands it’s not high enough; plus it’s about 15cm below the desk itself which is too low for my height. On the desk i already had an XP-PEN tablet so the Model 100 got placed next to it in a split fashion, on both sides. I had to drill two holes in the desk for the RJ45 cable so it doesn’t take unnecessary space, but it’s a worthy compromise.
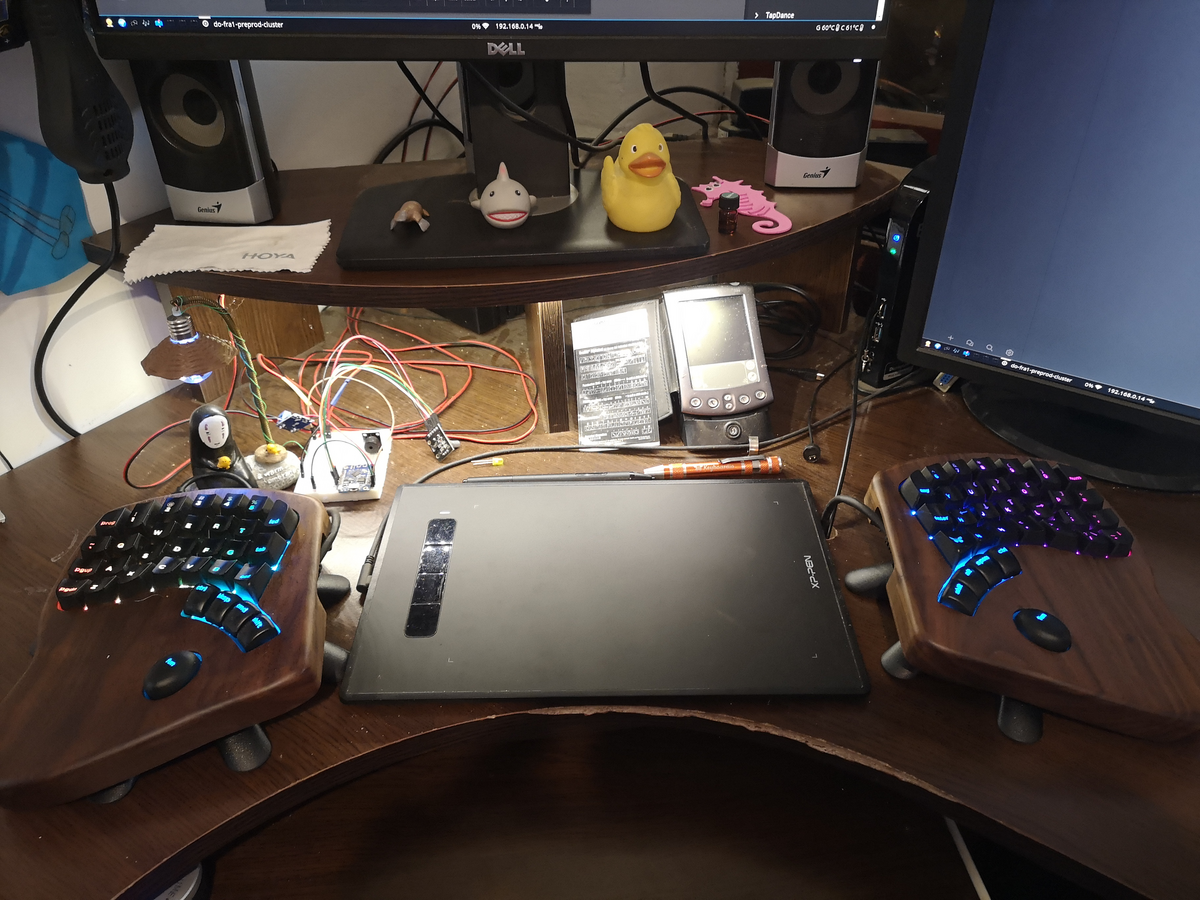
This is my current setup: a tablet with wings! And a messy table. And a rubber duck. And a rubber shark for tougher problems. And some retro-computing.
The Feel
With the adjustable stands it’s really comfortable. It took me a few tries, but now that it’s done my hands never felt this good on a keyboard before. It’s worth noting that i’m typing extensively on traditional keyboards since my early teens, so my arms developed a little different (my radius bones are slightly longer than they should be). I didn’t even have those V-shaped, so-called ergonomic ones, although i yearned for one. Some consequences of this are that my hands don’t feel distorted at all when i use traditional keyboards, stuff designed to be ergonomic for the general public might not be comfortable for me immediately, and typing on a split/ortholinear keyboard is totally new ground for me because for me this is distorted (a bit).
Holding your fingers on this keyboard is slightly different from traditional ones as you don’t have to keep them on a straight line, but the curve of the home row actually follows the curve of your fingers. You know those little bumps on the F and J keys? In case you don’t know, they are there to help you position your hands on the “home row” for touch typing (maybe the reason they call it touch typing instead of blind typing?); you have to find them with your index fingers, and you’re all set. Now, since you hold your hands a bit different on the Model 100, they didn’t only add this bump to the usual F / J keys, they are also present on A and ; so you can easily position your pinkies, too. Really thoughtful design!
Typing on it after using traditional keyboards for all these years is… different, to say the least. It took me some time to get up to a typing speed (ie. not hunt-and-pecking; heck, typing my 14 characters long desktop password took 3 tries for the first time) and it was clear that it should probably take days, if not weeks, to get up to my original speed. It’s a completely different experience and calls for lots of learning and maybe a layout change, too. For the record i use a Dvorak inspired layout for several years now; on this keyboard the letters are more or less where they should be, but some symbols are not that comfortable to reach than they were on my old one. A lot of non-letter keys are at different places: reaching for the top right for backspace and top left for escape was an issue for a while, but it’s almost completely gone now. It’s funny, though, that the keys arranged in this ortholinear fashion didn’t make my head spin too much. I did reach to the side a bit sometimes, but i got lost of that habit after only two days.
The learning process
Even though the designers suggest to start using split keyboards gradually (start with 15ish minutes in the morning and increase your usage every day) i used it almost exclusively for my first full workday. We had a short emergency at my $job for which i used my old keyboard because of speed, but other than that i used the Model 100. What can i say? I’m a rebel. Also, this method worked really good for me when i switched to Dvorak, so i guessed it will be fine for split keyboards, too.
Even after a day my typing speed was still far from my old one, but it got better every hour. I still occasionally pressed Num Lock when i wanted to Backspace (Backspace is under your left thumb on the default layout) and i often pressed Backspace when i wanted Space (Space is under your right thumb). Enter being to the left of my right index instead of being to the right of my right pinky was also confusing sometimes. I probably haven’t looked at my keyboard this much for, i don’t know… 20 years? But i was slowly getting rid of hunt-and-pecking which was a win in my book.
After more than a week the keyboard felt really good. I was already pretty close to my original typing speed which wasn’t super fast, but decent enough to amaze some non-techie persons.
Technicalities
This section is specific to Kaleidoscope, the factory firmware of the Model 100. If you want to use a different firmware (i guess you could, but don’t ask me how), just skip ahead.
Early delivery keyboards arrived with QWERTY keycaps and a default firmware, both holding some strange things.
Left half
First, there is a prog key at the top left corner. It is used by the keyboard’s boot loader to enter programming mode (ie. firmware upgrade), but otherwise it can be used as any other key (more on that later).
There’s also a led key, which sounded strange, but who knows… after giving it a few pushes it turned out that it was switching between different LED modes, of which there are plenty from a rainbow wave to dull single colour backlight.
Esc moved to the bottom right of the left half is also strange, but i guess there’s a reason for that.
Page Up and Page Down living on the leftmost column was also a big surprise and, as time showed, a real waste of precious keys for me as a hardly ever use those.
Right half
The first surprise was that although it does have a logo key (with a Keyboardio butterfly on it), it doesn’t act as one. Rather than that, it’s actually a right Alt, AKA AltGr key.
On the top left there is an any key. Like, a key actually labelled as any. It sends a random keystroke (showing you the power of macros).
Thumb rows
Under four rows of keys (except the middle two columns which only have three keys each) are four “thumb keys”, arranged in a way that your thumb can comfortably reach them.
On the left side, they are ctrl, backspace, cmd, and shift; on the right side they are shift, alt, space, and ctrl.
The cmd key’s label is foreign to PC people but is used a lot on Macs. Turned out it’s the Super key (AKA logo, AKA Windows key).
There are also two palm keys labelled as fun, which are placed so they are easy to press with your palms, but not easy enough so that you press them all the time. By default they act a bit like a regular notebook’s fn keys, adding extra functions to most keys like media player control, arrow keys, and mouse operations.
Layers
The default firmware has 5 layers: one for the basic keys (what you see printed on the keycaps), a number pad layer, one for the extra functions (what you get by using the fun keys), and two empty ones you can use for your own dark goals (after configuring them in Chrysalys; more about that later).
Layers don’t have a fixed order but they are stacked when you switch between them. You have a default layer, and when you press a layer changing key another one is put on top of that. Now when you press a key and it has a function configured, you get that function. The key can also be transparent on that layer, so the same key’s function from the layer below (the one previously active) will be activated. If it’s transparent on that layer, too, then the layer below that will be taken, etc. If you hit a transparent key on the bottom layer, it acts as a blocked key. Keys can also be configured as blocked; blocked keys don’t send anything, as if they weren’t even there.
There are four different layer change modes:
- Layer Shift is temporary, like how the Shift key works
- Locking also pushes the new layer onto the old one like shifting does, but it remains active, like how Caps Lock works
- Moving clears the whole stack and makes the target layer the default one. This is like changing your keyboard layout in the OS
- The OneShot plugin (enabled by default) adds another method, labelled “layer shift for next action” in Chrysalis. If you press such a key once, it will act like a layer lock for the next single keypress. If you press it twice, it will act as a layer lock, until the OneShot effect is cancelled (with the Escape key, or with a preconfigured “OneShot cancel” key). Pressing it once more will also disable the OneShot effect.
Mouse functions
The keyboard itself doesn’t just advertise itself as a keyboard, but a fully compliant HID, Human Interface Device. It can also act as a mouse, except instead of moving around a piece of plastic on your desk, you press keys. I put away my actual mouse for about 30 minutes and made myself using the mouse functions exclusively, and i must say it’s not terrible. For the record, i don’t use the mouse too much; mostly for gaming only. Well, for gaming you probably won’t use a keyboard based mouse (especially not for mouse-heavy shooters), but for my desktop use case it’s totally enough.
The most useful feature here (for me) is having a scroll wheel integrated into my keyboard. This way i don’t have to reach for the mouse when all i want to do is scroll down a bit (for one-page scrolling there’s still Space).
Mouse movement is… not ideal. It starts very slowly and gradually increases the pointer speed to so fast you won’t be able to follow it with your eyes. There’s also mouse warping for moving to the different corners of your screen, but it doesn’t work well on my multi-monitor Sway setup; i haven’t tried it on other OSes or desktop environments.
LEDs
I experimented with the LEDs, too. Every key has it’s own RGB LED underneath and all of them can be customised to be lit in different colours. The firmware has a lot of modes from your average single-colour backlight through moving rainbow gradients to more exotic ones. My favourite is called Stalker (we agreed with the authors that it’s a pretty bad name) with the blazing trail effect: whenever you press a key it lights up in white, then fades through red to turned off. It looks really cool, especially since i have accumulated some actual typing speed so the LEDs don’t have time to turn off before i press the same key again. Not the ideal one for typing passwords in public, though. Also, if you use the ColorMap mode, you can configure a different LED layout for any or all of your layers which can be super helpful in some cases. Unfortunately the LED mode is global, so you can’t have different modes for different layers, unless you write a plugin (although you can get close enough with colormap).
The Software
Chrysalis is a “desktop application” to configure your Kaleidoscope based keyboard on the fly. It’s a really good one; my only problem with it is that it’s based on Electron (ie. not a real desktop app, just a fancy web page running in a dedicated browser), although i do understand the choice: iterating over new features is really straightforward and fast this way without risking that one platform falls behind another.
I had some trouble making it run on my desktop (i’m using Sway, a Wayland based window manager; it’s not your everyday Linux setup unless you’re a geek like me), and there were some permission issues, too; but it all worked out fast thanks to their developer, @algernon’s help (one of the software’s developers, and with whom we share first names!)
Chrysalis has just the right amount of bells and whistles and it can fully customise every single key (given you use the official firmware, which you don’t have to, but i really think you should, at least until you get used to it). There are some things to grasp before you start using it (layers being the one of them), but after that one can probably use it without much of a thought.
Closing thoughts
I originally wanted to write about my final setup (as of now) but it would have doubled the length of this post, so it will have its own.
All in all, the Model 100 is a really good keyboard. I could probably have spent this money better given that i’m a family man with kids and a house that constantly needs fixing, but i’m happy i didn’t. If you type a lot then you should probably treat your hands with a split and/or ortholinear keyboard. It gives a fantastic experience.
Also, given the whole thing is open source, and all the parts you need are available to buy you can even build one at home, but if you have the money you should definitely buy it. If for nothing else, then as a heirloom.